I was recently asked to be a guest on the third-anniversary episode of the CRM Audio podcast. While I was there George Doubinski challenged me to create a plugin in one Dynamics 365 organization to retrieve records from another Dynamics 365 organization so they could be displayed as virtual entities. I was promised adulation on Dynamics CRM Tip of the Day and fame beyond my wildest dreams, so naturally I accepted.

To address the challenge, I wrote a simple Dynamics 365 plugin that calls the Web API in a different Dynamics 365 organization to retrieve records and return them to a virtual entity data provider. From there, configuration of the Dynamics 365 virtual entity is simple. Let's take a look at how I did it.
The plugin
First you need to create a plugin to retrieve the data from the "external" Dynamics 365 org. Because this code connects directly to the Web API, you'll need to get an access token from Azure AD before you can make the request to Dynamics 365. Just like I showed in my "Scheduling Dynamics 365 workflows with Azure Functions and C#" post back in 2016, my sample code does not use ADAL to get the access token, but rather it issues a request directly to the Azure AD OAuth 2 token endpoint.
Here's the code for the plugin. There are some configuration values you'll need to set for your Dynamics 365 organization and whatever query you want to run. It's not a best practice to have any of this actually hardcoded in your plugin, but I've done it this way so it's easier to see how things work.
using Microsoft.Xrm.Sdk;
using Microsoft.Xrm.Sdk.Data.Exceptions;
using Microsoft.Xrm.Sdk.Extensions;
using Microsoft.Xrm.Sdk.Query;
using System;
using System.IO;
using System.Net;
using System.Threading.Tasks;
using Newtonsoft.Json;

namespace VirtualEntityProvider
{
    public class RetrieveOtherOrgData : IPlugin
    {
        //set these values for your D365 instance, user credentials and Azure AD clientid/token endpoint
        string crmorg = "https://XXXXX.crm.dynamics.com";
        string clientid = "XXXXXXXXX";
        string username = "lucasalexander@XXXXXX.onmicrosoft.com";
        string userpassword = "XXXXXXXXXXXX";
        string tokenendpoint = "https://login.microsoftonline.com/XXXXXXXXXXX/oauth2/token";

        //relative path to web api endpoint
        string crmwebapi = "/api/data/v8.2";

        //web api query to execute - in this case all accounts that start with "F"
        string crmwebapipath = "/accounts?$select=name,accountid&$filter=startswith(name,'F')";

        public void Execute(IServiceProvider serviceProvider)
        {
            //basic plugin set-up stuff
            IPluginExecutionContext context = (IPluginExecutionContext)serviceProvider.GetService(typeof(IPluginExecutionContext));
            IOrganizationServiceFactory servicefactory = (IOrganizationServiceFactory)serviceProvider.GetService(typeof(IOrganizationServiceFactory));
            IOrganizationService service = servicefactory.CreateOrganizationService(context.UserId);
            ITracingService tracingService = (ITracingService)serviceProvider.GetService(typeof(ITracingService));

            try
            {
                //instantiate a new entity collection to hold the records we'll return later
                EntityCollection results = new EntityCollection();

                //build the authorization request for Azure AD
                var reqstring = "client_id=" + clientid;
                reqstring += "&resource=" + Uri.EscapeUriString(crmorg);
                reqstring += "&username=" + Uri.EscapeUriString(username);
                reqstring += "&password=" + Uri.EscapeUriString(userpassword);
                reqstring += "&grant_type=password";

                //make the Azure AD authentication request
                WebRequest req = WebRequest.Create(tokenendpoint);
                req.ContentType = "application/x-www-form-urlencoded";
                req.Method = "POST";
                byte[] bytes = System.Text.Encoding.ASCII.GetBytes(reqstring);
                req.ContentLength = bytes.Length;
                System.IO.Stream os = req.GetRequestStream();
                os.Write(bytes, 0, bytes.Length);
                os.Close();

                HttpWebResponse resp = (HttpWebResponse)req.GetResponse();
                StreamReader tokenreader = new StreamReader(resp.GetResponseStream());
                string responseBody = tokenreader.ReadToEnd();
                tokenreader.Close();

                //deserialize the Azure AD token response and get the access token to supply with the web api query
                var tokenresponse = JsonConvert.DeserializeObject<Newtonsoft.Json.Linq.JObject>(responseBody);
                var token = tokenresponse["access_token"];

                //make the web api query
                WebRequest crmreq = WebRequest.Create(crmorg+crmwebapi+crmwebapipath);
                crmreq.Headers = new WebHeaderCollection();

                //use the access token from earlier as the authorization header bearer value
                crmreq.Headers.Add("Authorization", "Bearer " + token);
                crmreq.Headers.Add("OData-MaxVersion", "4.0");
                crmreq.Headers.Add("OData-Version", "4.0");
                crmreq.Headers.Add("Prefer", "odata.maxpagesize=500");
                crmreq.Headers.Add("Prefer", "odata.include-annotations=OData.Community.Display.V1.FormattedValue");
                crmreq.ContentType = "application/json; charset=utf-8";
                crmreq.Method = "GET";

                HttpWebResponse crmresp = (HttpWebResponse)crmreq.GetResponse();
                StreamReader crmreader = new StreamReader(crmresp.GetResponseStream());
                string crmresponseBody = crmreader.ReadToEnd();
                crmreader.Close();

                //deserialize the response
                var crmresponseobj = JsonConvert.DeserializeObject<Newtonsoft.Json.Linq.JObject>(crmresponseBody);

                //loop through the response values
                foreach (var row in crmresponseobj["value"].Children())
                {
                    //create a new virtual entity of type lpa_demove
                    Entity verow = new Entity("lpa_otheraccount");
                    //verow["lpa_otheraccountid"] = Guid.NewGuid();
                    //verow["lpa_name"] = ((Newtonsoft.Json.Linq.JValue)row["name"]).Value.ToString();
                    verow["lpa_otheraccountid"] = (Guid)row["accountid"];
                    verow["lpa_name"] = (string)row["name"];

                    //add it to the collection
                    results.Entities.Add(verow);
                }

                //return the results
                context.OutputParameters["BusinessEntityCollection"] = results;
            }
            catch (Exception e)
            {
                tracingService.Trace($"{e.Message} {e.StackTrace}");
                if (e.InnerException != null)
                    tracingService.Trace($"{e.InnerException.Message} {e.InnerException.StackTrace}");

                throw new InvalidPluginExecutionException(e.Message);
            }
        }
    }
}
Because the plugin uses JSON.Net, you'll need to use ILMerge to bundle the Newtonsoft.Json.dll assembly with your compiled plugin before you deploy it to Dynamics 365.
Setting up the virtual entity
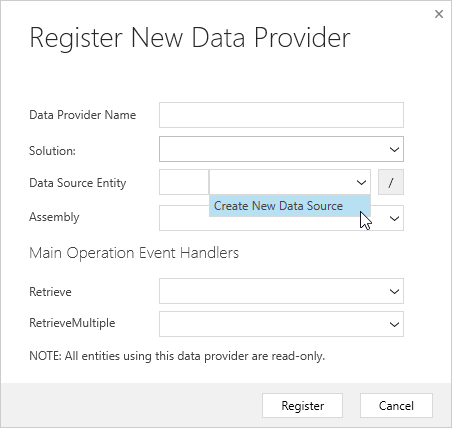
After you've deployed the plugin using the plugin registration tool, register a new data provider. When the data provider registration window opens, first create a new data source entity.
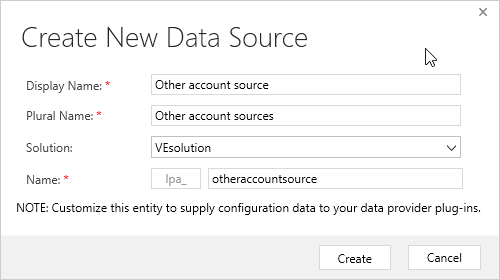
Complete the details for the data source and save it.
Complete the rest of the details for the data provider and save it. 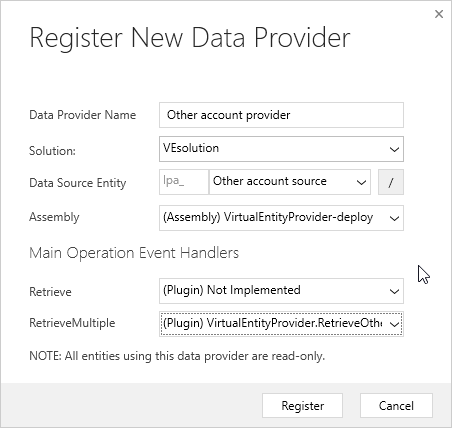
You should now see a new data provider and data source. 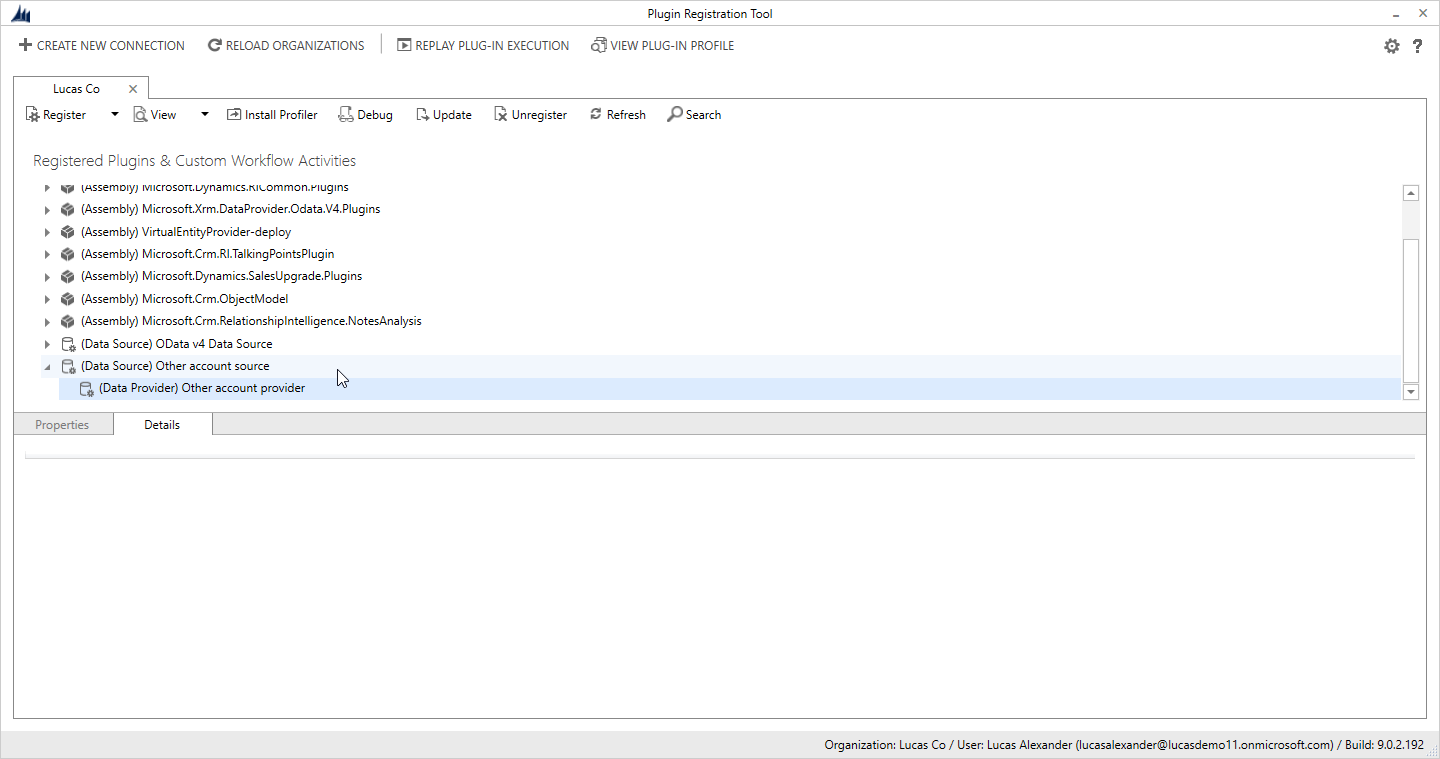
Open the Dynamics 365 web UI, and go to settings->administration->virtual entity data sources. 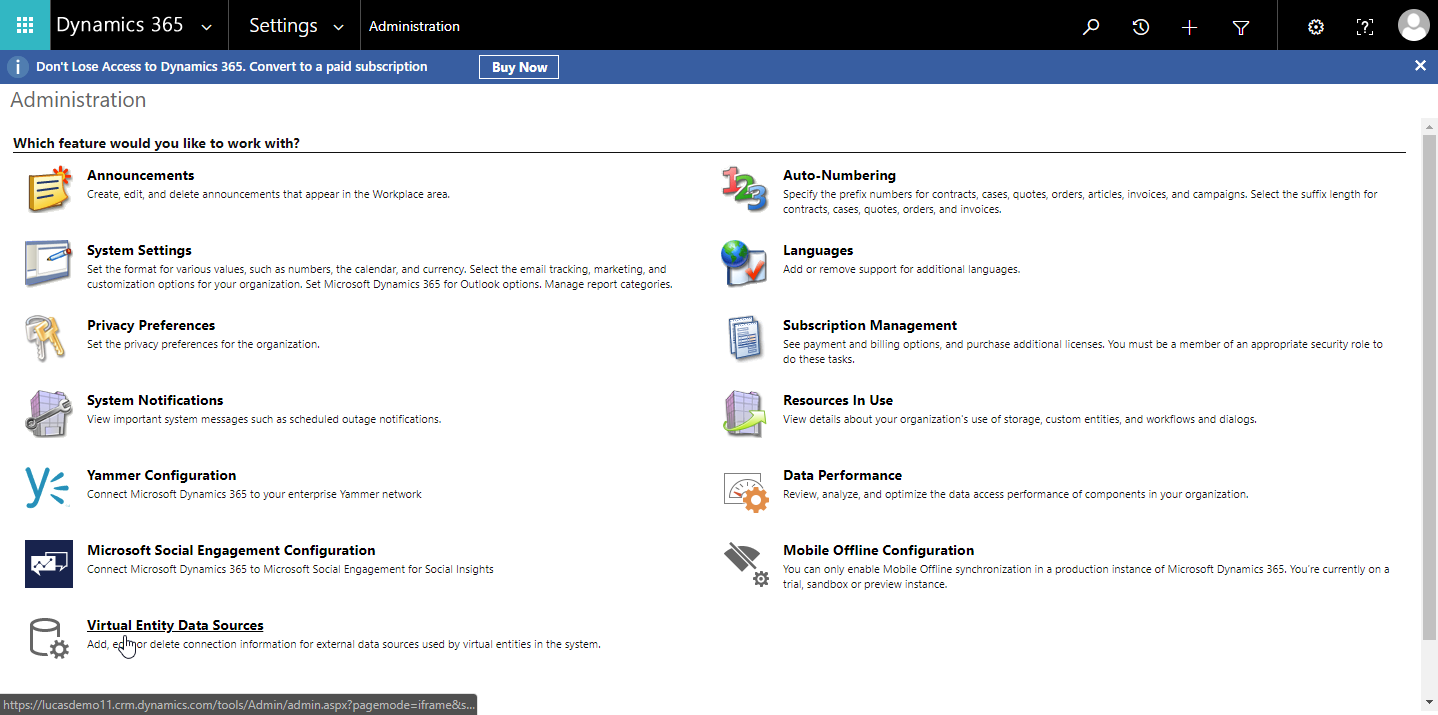
Click the "new" button to create a new virtual entity data source. 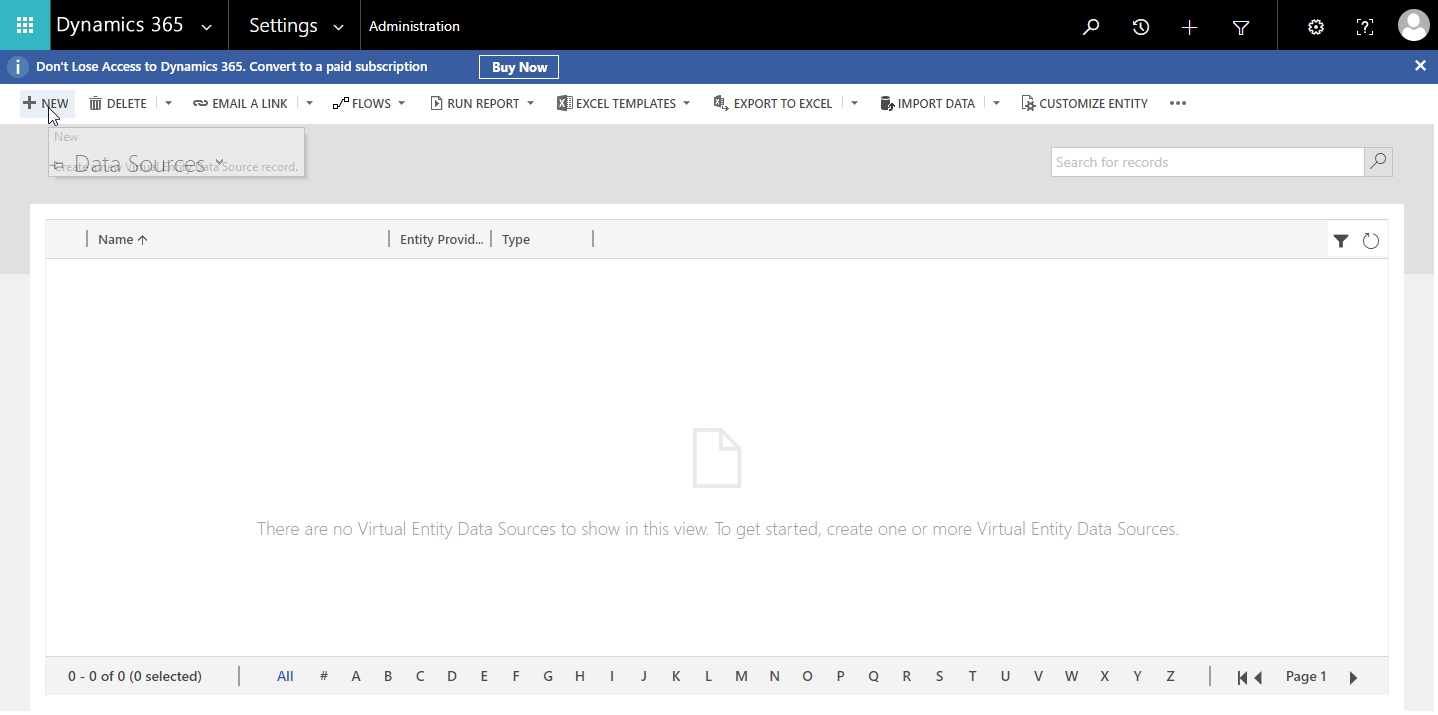
In the window that pops up, select the data provider you created earlier. 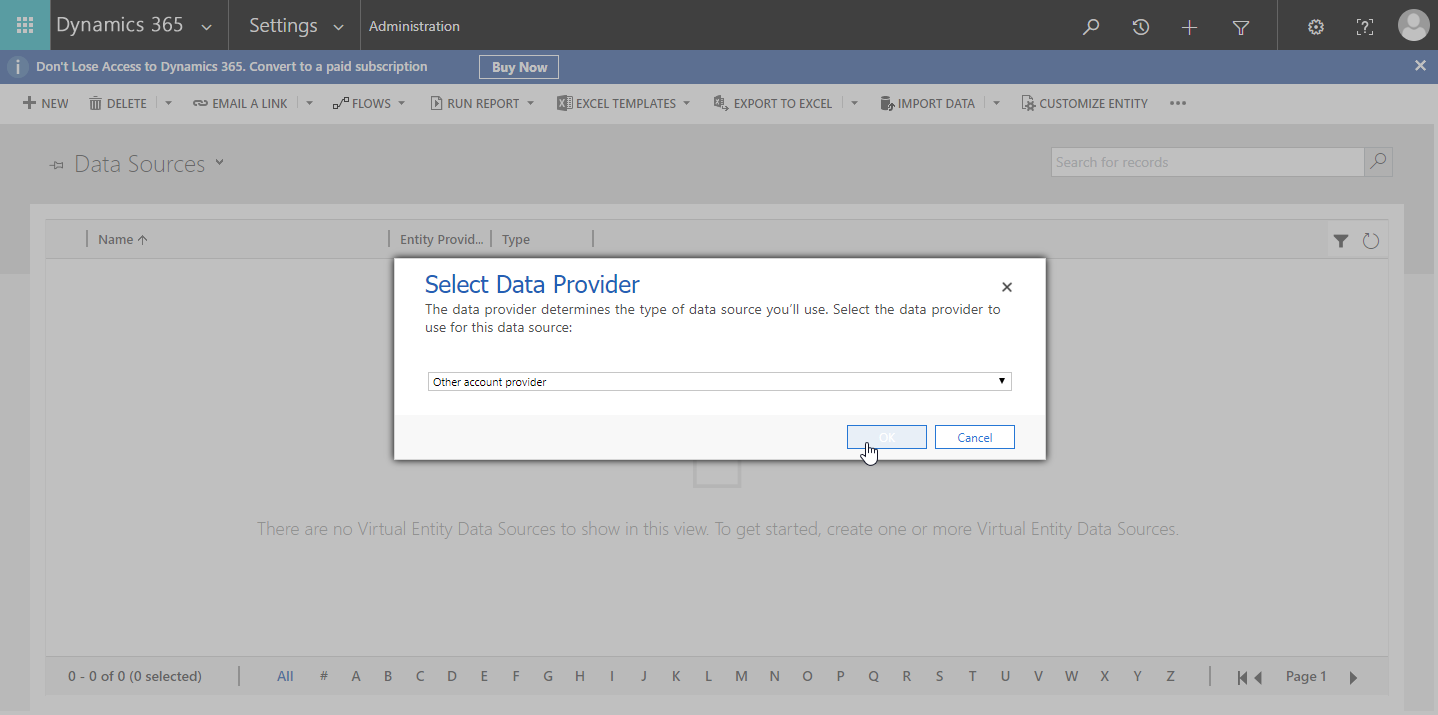
Give your new virtual entity data source a name and save it. 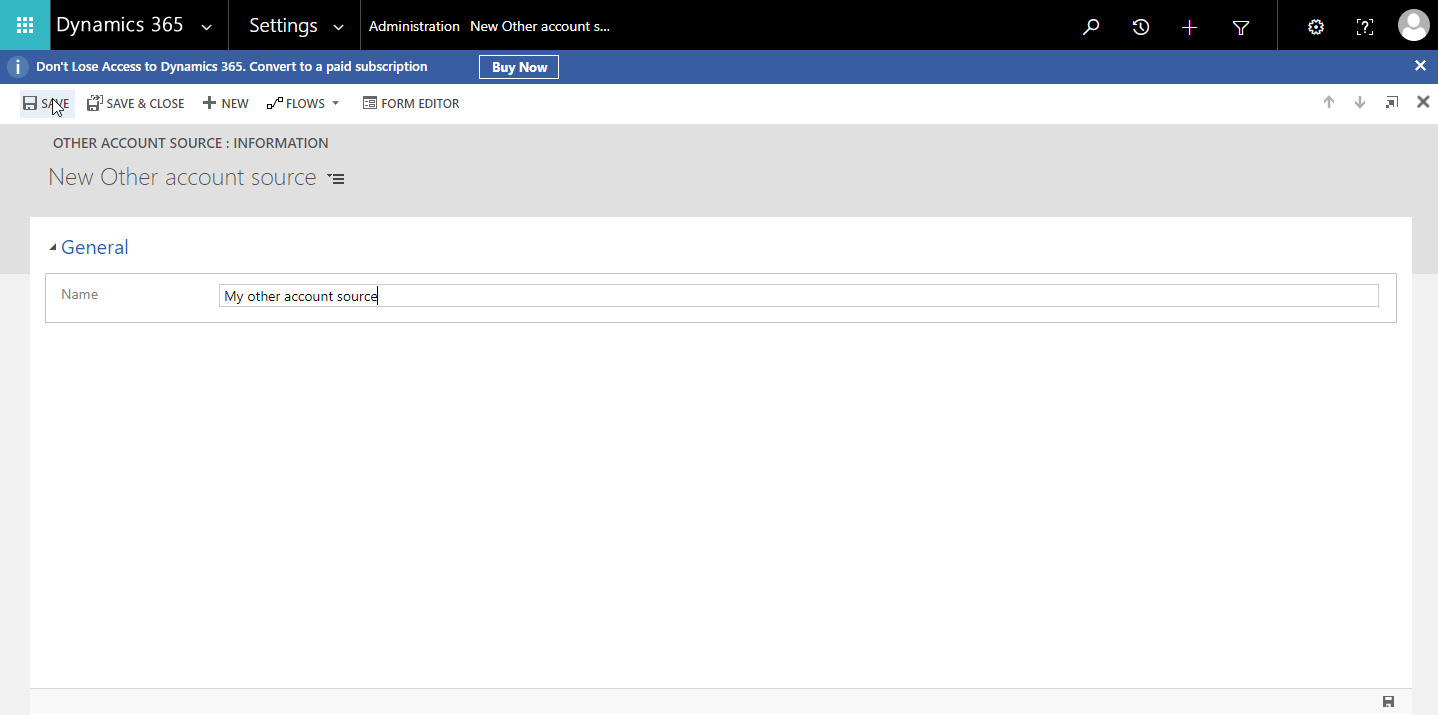
Open your solution and create a new entity. 
Configure your entity as a virtual entity that uses the virtual entity data source you created previously. 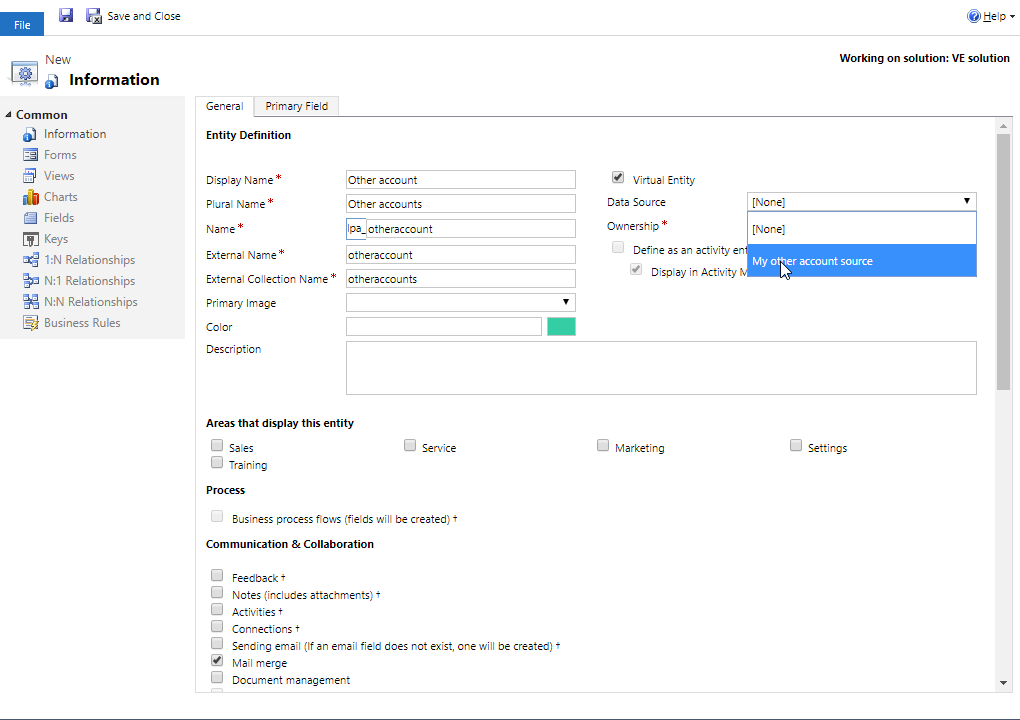
Once you save and publish the virtual entity, you can open an advanced find view that will retrieve data from your other Dynamics 365 organization and display it. 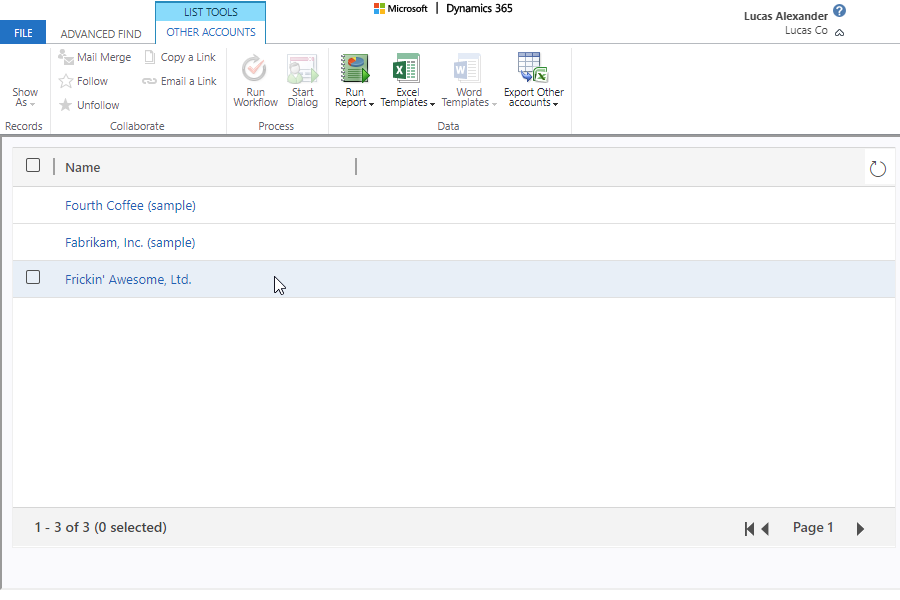
If you export this data to Excel and unhide the id column, you will see that the GUIDs match the records in the external system.
And that's all there is to it. Happy entity virtualizing!