A Dynamics 365 local message listener for web client notifications - part 3
Several months ago I discussed an approach for passing notifications from local applications to the Dynamics 365 web client through a message listener process that runs on an end user’s PC and shared some sample code for how to implement it.
Recently I used this approach to establish communication between Dynamics 365 web resources and a fingerprint reader attached to a local PC. The actual coding was fairly simple, but I did run into a problem that I did not encounter when I built my original proof-of-concept message listener because I was accessing Dynamics 365 via HTTPS as opposed to HTTP like I had been in my on-prem development sandbox. Because mixed content can be a security risk, modern browsers typically block pages that are accessed via HTTPS from loading scripts over HTTP, which is how my listener process was running.
In order to make my listener process accessible via HTTPS, I did the following:
- Generated a self-signed SSL certificate to represent a root certificate authority.
- Generated an SSL certificate signed by my root CA to encrypt communication with my message listener process.
- Added the root SSL certificate from step #1 as a trusted root certificate on the local PC.
- Added the SSL certificate from step #2 to the personal certificate store on the local PC.
- Bound the SSL certificate from step #2 to the port my listener process uses.
####Generating the certificates This blog post has detailed steps I followed to generate self-signed certificates with PowerShell’s New-SelfSignedCertificate cmdlet. In the past I have used OpenSSL to generate self-signed certificates, and while OpenSSL would definitely work here, I found the PowerShell approach to be much easier for my initial development purposes.
(A note on security - As I look at making this solution fully ready for production, I need to do some further investigation into the security implications of using self-signed certificates. Because I am only using them to enable communication with a process running on the local PC, I think the risks are minimal as long as the root certificate is kept secure.)
####Installing the certificates Once you have generated your two SSL certificates, you need to install them on the local PC. If you followed the directions from the blog post above to generate your certificates, you should have a public certificate for your root CA as a .cer file and a private certificate to use for the application as a .pfx file.
To install the root certificate as a trusted root certificate authority, do the following:
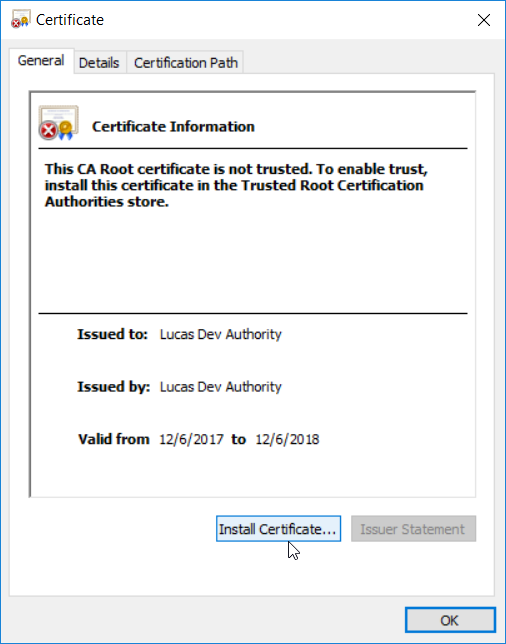
- Double-click public certificate (.cer file) for the root CA you generated. The certificate properties window will open. Click “install certificate.”
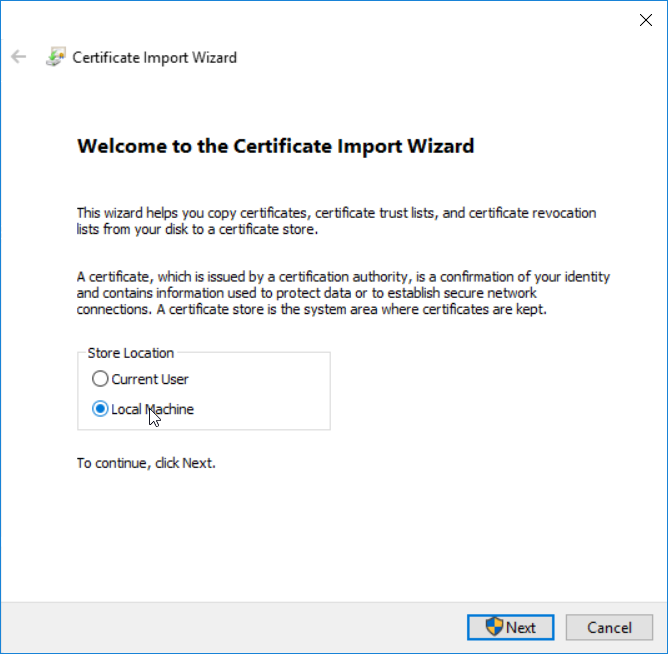
- The certificate import wizard will open. Select “local machine” and click next.
- You may be presented with a confirmation dialog asking if you “want to allow this app to make changes to your device.” If so, click yes.
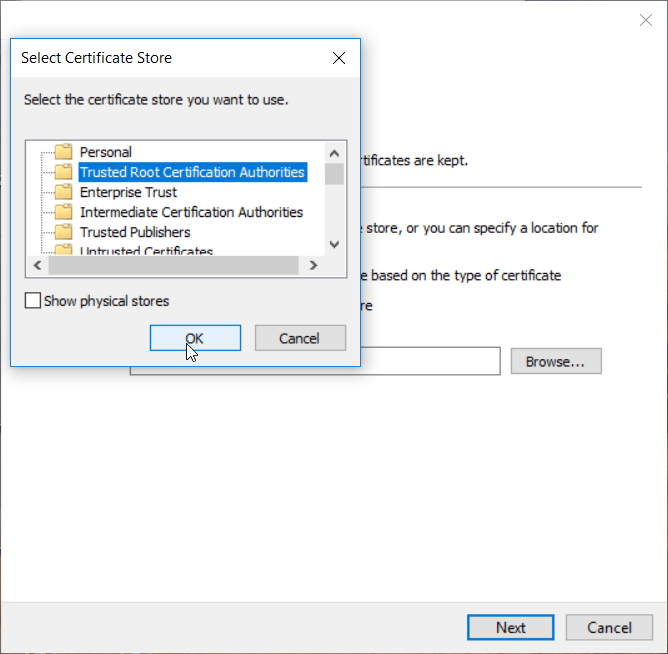
- On the next screen, select “place all certificates in the following store” and click browse.
- Select “trusted root certification authorities.”
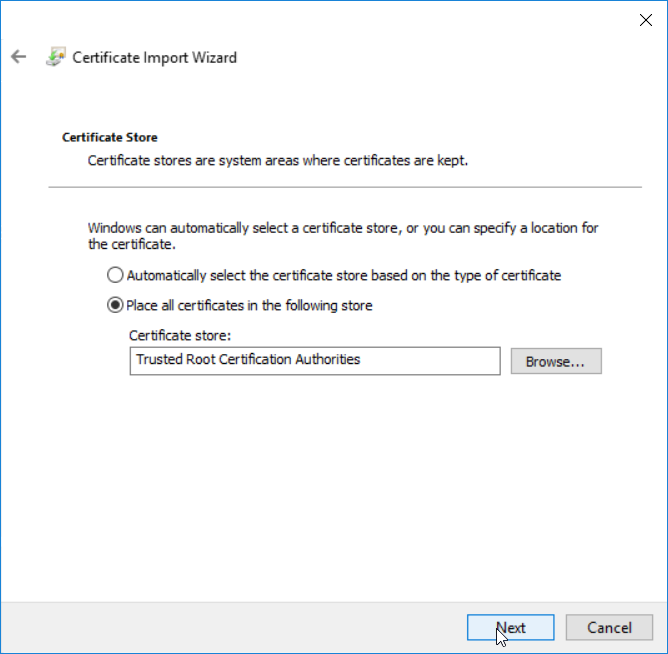
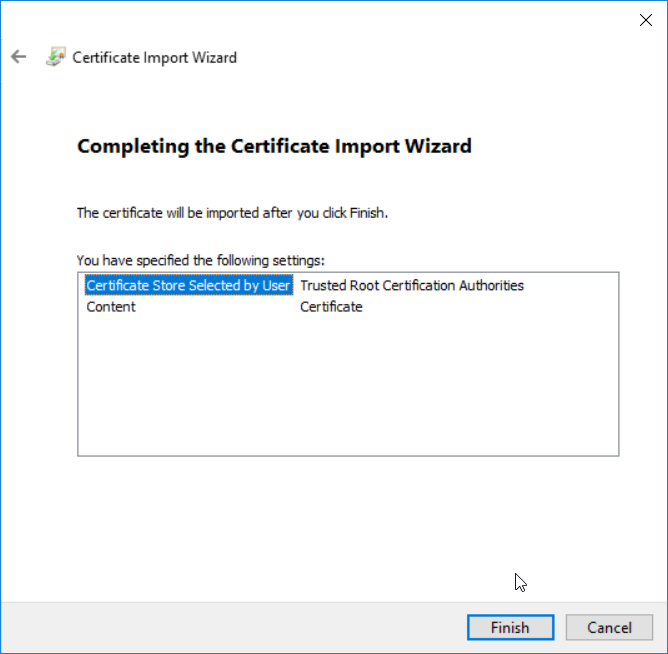
- Verify the certificate store input shows “trusted root certification authorities” and click next.
- Click finish.
- You will receive a success message. Click OK to close it.
- Close the certificate properties window.
To install the SSL certificate that will encrypt communication with the message listener, do the following:
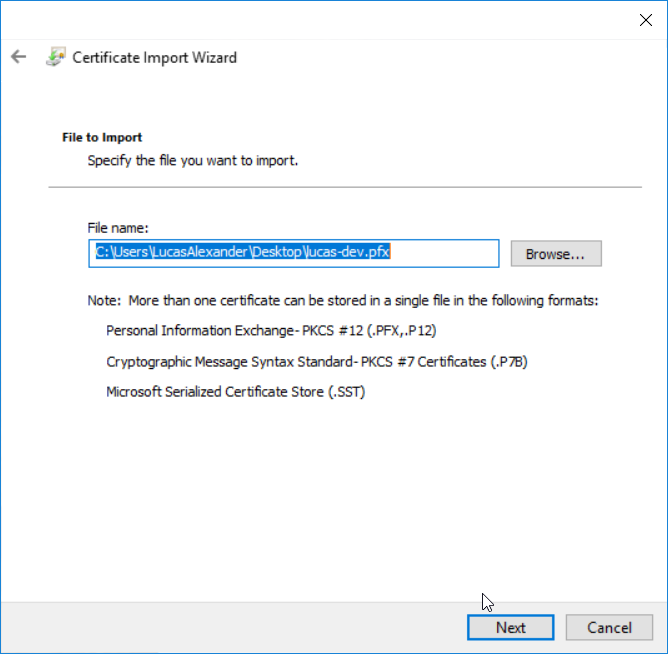
- Double-click private certificate (.pfx) for the application certificate CA you generated. The certificate import wizard will open. Select “local machine” and click next.

- You may be presented with a confirmation dialog asking if you “want to allow this app to make changes to your device.” If so, click yes.
- You will see the name of your .pfx file in the file name input box. Click next.
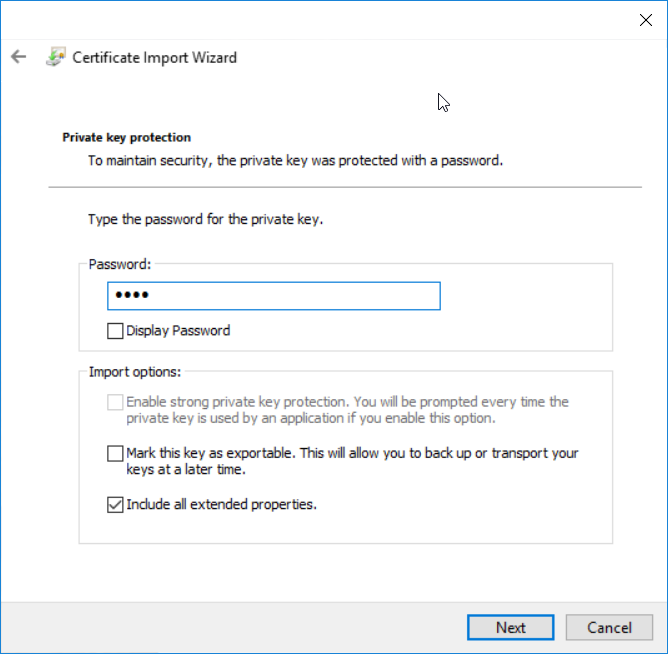
- Enter the password for the .pfx file and click next.
- On the next screen, select “place all certificates in the following store” and click browse.
- Select “personal.”

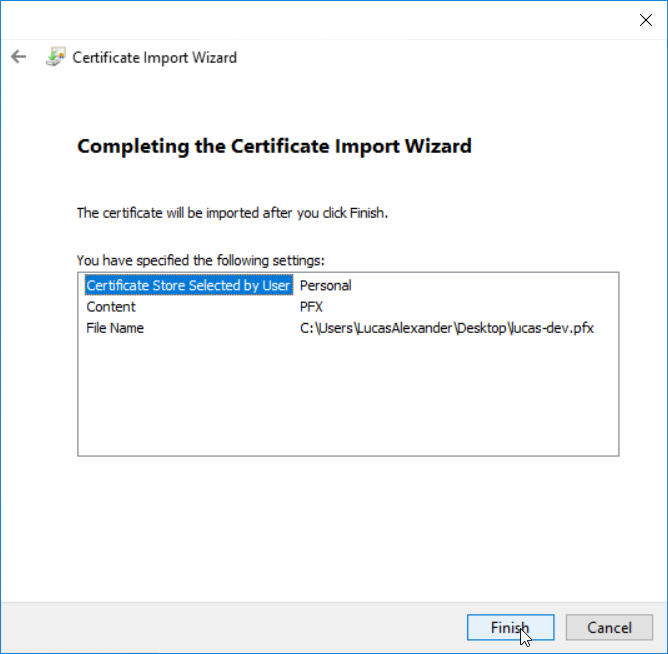
- Verify the certificate store input shows “personal” and click next.

- Click finish.
####Binding the application SSL certificate to the message listener port Once you have installed the certificates on the local PC, you can bind the application SSL certificate to the port on which the message listener is listening. I am using Windows 10, but the directions outlined in this Microsoft document for Windows Vista worked for me. Presumably they will also work for Windows 7 and 8.
If you don’t feel like reading the entire document, basically you can use the netsh command to encrypt all requests on a specific port for a specific application using a specific SSL certificate. Here’s how to configure it:
- Get the thumbprint from the SSL certificate you installed in the “personal” store following the instructions here - https://docs.microsoft.com/en-us/dotnet/framework/wcf/feature-details/how-to-retrieve-the-thumbprint-of-a-certificate.
- Get the application id from your message listener application. If your message listener is a .Net application, you would use the “Assembly: Guid” value from your application’s AssemblyInfo file.
- Open a command prompt as an administrator and execute the following command:
netsh http add sslcert ipport=0.0.0.0:9345 certhash=CC5F7BF58FD666EEC844C1B949E9661267A8A310 appid={b31bee72-c2ac-411e-959b-adbd25bba2cf}You will need to substitute your specific values for “ipport,” “certhash” and “appid.” - Verify your configuration works by starting your message listener and then making an HTTPS request.
Assuming everything works, you should now be able to access your local message listener process from your Dynamics 365 web resources. If you want to use the message listener on other PCs, you don’t have to regenerate new certificates. You can just install the same certificates and run the same netsh command on every PC where the listener application will run.
What do think about this approach? Are there any real-world scenarios where it would be useful for you?